An Alternative to Events – Attribute Passing
These three posts have looked at Application Events, Component Events and the differences between.
The example shown was a simpler sender and receiver of messages.
As with a lot of Salesforce there are many different ways to do the same things and this post is a simpler way of doing the same thing (with a couple of restrictions).
Instead of using an event to send the message between the two parts of the component they can actually share an attribute between. In pure programming terms this is called ‘Pass by Reference’.
The basics are the same:
Setup
- Create a lightning control called AttributeSenderReceiver this will have implements=”flexipage:availableForAllPageTypes” so that it can be on a lightning app page. This control will the main one on the page.
- Create a lightning control called AttributeSender – this will do the message box and sending code.
- The AttributeSender has the same code for the presentation of the message box and Send button
<aura:component >
<aura:attribute name="message" type="String" default="" access="public" description="accessed by parent"/>
<article class="slds-card">
<div class="slds-card__header slds-grid">
<header class="slds-media slds-media_center slds-has-flexi-truncate">
<div class="slds-media__body">
<h2>
<span class="slds-text-heading_small">Sender</span>
</h2>
</div>
</header>
</div>
<div>
<lightning:input type="text" label="Message" class="slds-input" value="{!v.message}" placeholder="Enter your message..." /><br/>
<lightning:button class="slds-button slds-button_brand" onclick="{!c.sendMessage}">Send</lightning:button>
</div>
</article>
</aura:component>
The main change is :

<aura:attribute name=”message” type=”String” default=”” access=”public” description=”accessed by parent”/>
and then this is hooked up to the lightning:input box

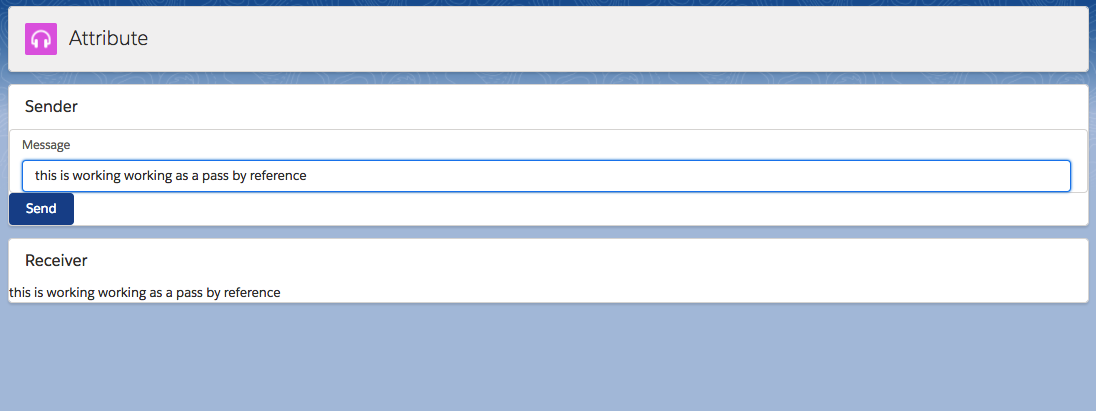
At this stage the code does not need the Send Button. As soon as the text changes the attribute changes.
Because the attribute changes and as we will see the parent passes a reference to another attribute the parent attribute changes. Immediately.
AttributeSenderReceiver
To add the AttributeSendeReceiver component to this component add
<aura:component implements="flexipage:availableForAllPageTypes" access="global" >

<aura:attribute name="SenderMessage" type="String" access="public"/><c:AttributeSender message="{!v.SenderMessage}"/>
<aura:attribute name="receivedMessages" type="String" default="Messages will appear here"/>

<article class="slds-card">
<div class="slds-card__header slds-grid">
<header class="slds-media slds-media_center slds-has-flexi-truncate">
<div class="slds-media__body">
<h2>
<span class="slds-text-heading_small">Receiver</span>
</h2>
</div>
</header>
</div>
<div>
<lightning:formattedText value="{!v.SenderMessage}"/>
</div>
</article>

</aura:component>
The important bit is :

This first line creates the attribute and sets the access to public so that it can be passed around. Then when the AttributeSender is set the attribute is passed. thing of this not as setting the message to be the value of the attribute but the actual attribute.
This means that if, in the AttributeSender, the message attribute is changed then we will see SenderMessage attribute change.
In this initial version by setting:
<lightning:formattedText value="{!v.SenderMessage}"/>
Then everything is immediate and works by:
- A letter is typed in the AttributeSender message box
- This changes the attribute in the AttributeSender
- This changes the attribute in the AttributeSenderReceiver (because it is the same reference)
- The text is shown as the value on the formattedText
.
There is some code in here that is not needed – you will see that there is no need to have the Send button the text appears immediately in the Receiver area.
This could be what you need.
The next post will tidy the code up to use the ‘Send’ button.


