Let’s Talk about a New Record Dialog
The last post started with saying that with Salesforce in that many times the most complicated things are the easiest and the simplest things are the hardest.
In this post we will explore a possible approach to the situation where you want to create a new record with only a few fields of information in a simple ‘small’ dialog box and then present the full page layout afterwards.
We will use our travel object

Say we want to present only the ‘Travel Name’ field to then present the final page layout afterwards.
One (and there will be a few different ways) approach is to use record types and different page layouts. This is good as it stays well in the declarative world that Salesforce would like us to stay in as far as possible. So we will already have a Master record type and we will set up a New record type.
So to get moving it is best to set up the New page layout ready for the record type:
- Go to our object and ‘Page Layouts’
- There will be a default page layout for the Master record type
- Click New for a New page layout
- Enter ‘New Record’ as the Page Layout Name and leave the ‘Existing Page Layout’ as –None–
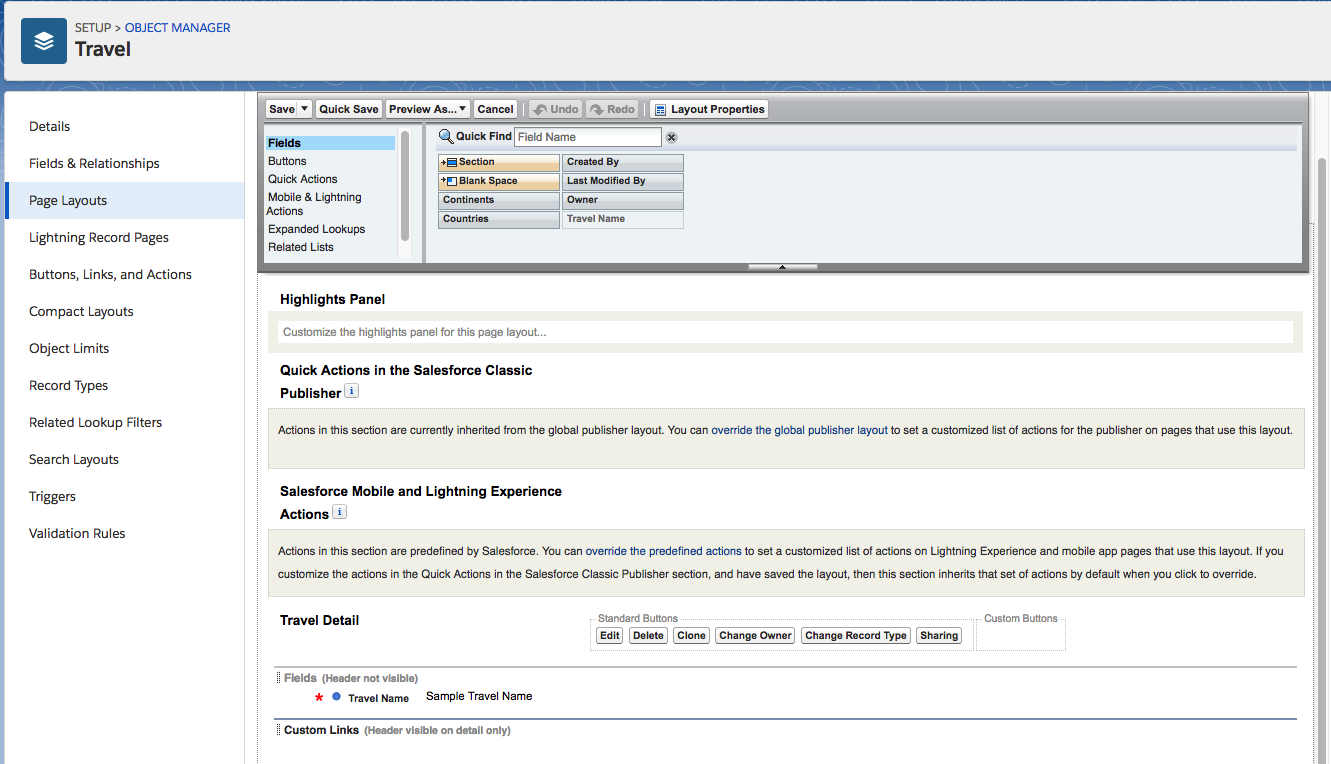
- This is already set up with just the ‘Travel Name’ field so this will work for us (you should add in any other fields you need for the new record
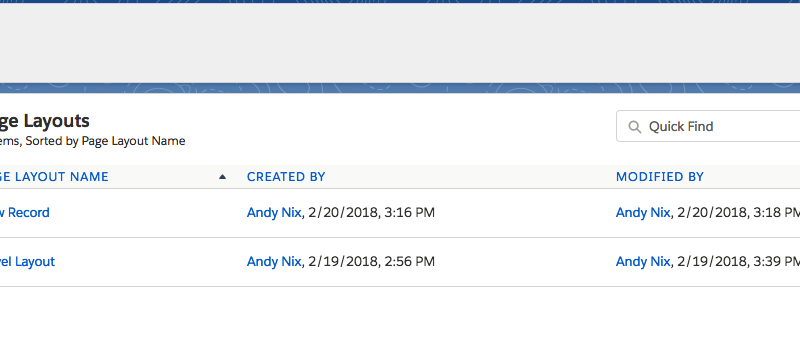
- Save this and return to the Page Layout screen. You will now have two page layouts

- Now under ‘Record Types’ from the menu we will set up a Record Type called ‘New’ by selecting the New button. It looks like there are no record types but Master is created as a default and not shown until a new record type is created.
- On the ‘Assign Page Layout’ screen set the layout for the ‘New’ record type to be the ‘New Record’ page layout.
- We need another Record type called ‘Main’ so repeat the previous two steps to and match the page layout to the default ‘Travel Layout’.
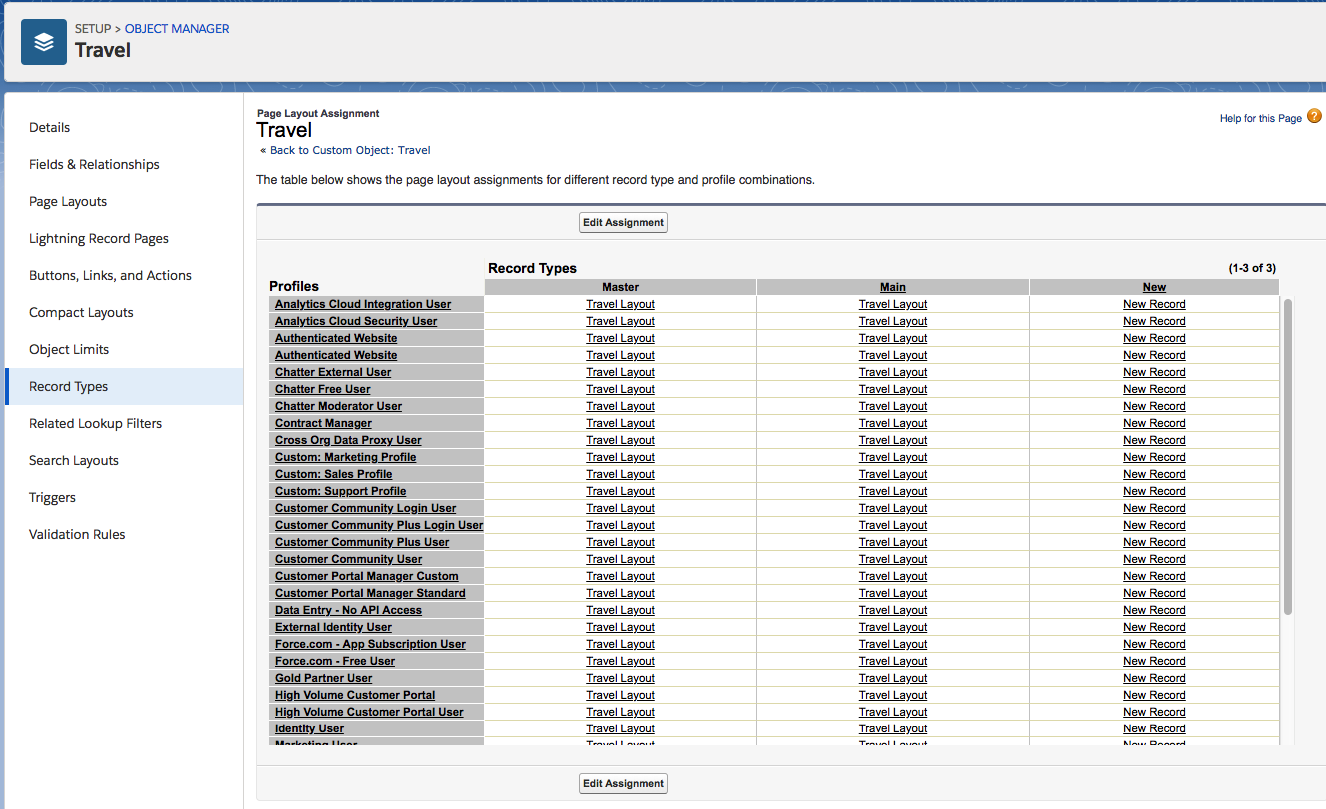
- As a quick check on the ‘Edit Assignment’ screen on the record type summary will show
- Now if a new record is click for the record. There is an initial dialog box asking for the record type (would be great not to show this)
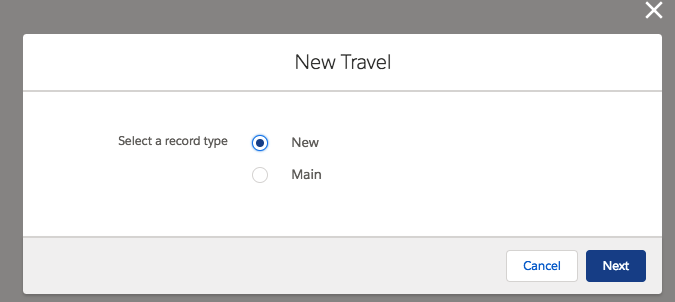
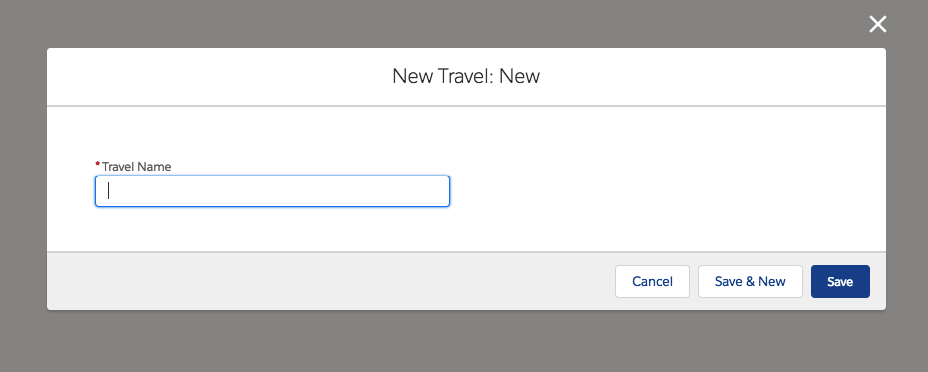
But we have a small problem in that the record type is stuck as ‘New’ and we need to get it back to the normal record type so that the other fields display to be entered. The best tool for this purpose is the process builder. We can use that to set the record type back to normal.
But first we need a bit of a hack to get the RecordIDs of the Record Types. Select the Record Types from the menu and then select the ‘New’ record type. The link that gets displayed is
one/one.app#/setup/ObjectManager/01I1I000001aldV/RecordTypes/page?address=%2Fsetup%2Fui%2Frecordtypefields.jsp%3Fid%3D0121I000000BApEQAW%26type%3D01I1I000001aldV%26retURL%3D%252Fsetup%252FObjectManager%252F01I1I000001aldV%252FRecordTypes%252Fview
and for the Main
one/one.app#/setup/ObjectManager/01I1I000001aldV/RecordTypes/page?address=%2Fsetup%2Fui%2Frecordtypefields.jsp%3Fid%3D0121I000000BApJQAW%26type%3D01I1I000001aldV%26retURL%3D%252Fsetup%252FObjectManager%252F01I1I000001aldV%252FRecordTypes%252Fview
After the id%3D and before the %26 is the record type. So we need to find a record of type 0121I000000BApEQAW and change it to 0121I000000BApJQAW
IMPORTANT: The record type id is unique to the instance so doing this in a sandbox and then production will have different IDs !!
- So from Setup under ‘Process Automation’ select ‘Process Builder’
- Set up a new process builder called ‘Change Record Type for New Travel Records’
- The process starts when a record changes and click Save
- From the new window, select the ‘+ Add Object’ and select the Travel Object and start the process when a record is created. Save this step.
- We will check if we have a record type of New and then if so change to Master
- On the Add criteria, set the name to be ‘Look for New’. Set the Field to be Record Type ID and the value to your ID that you are looking for 0121I000000BApEQAW. Click Save
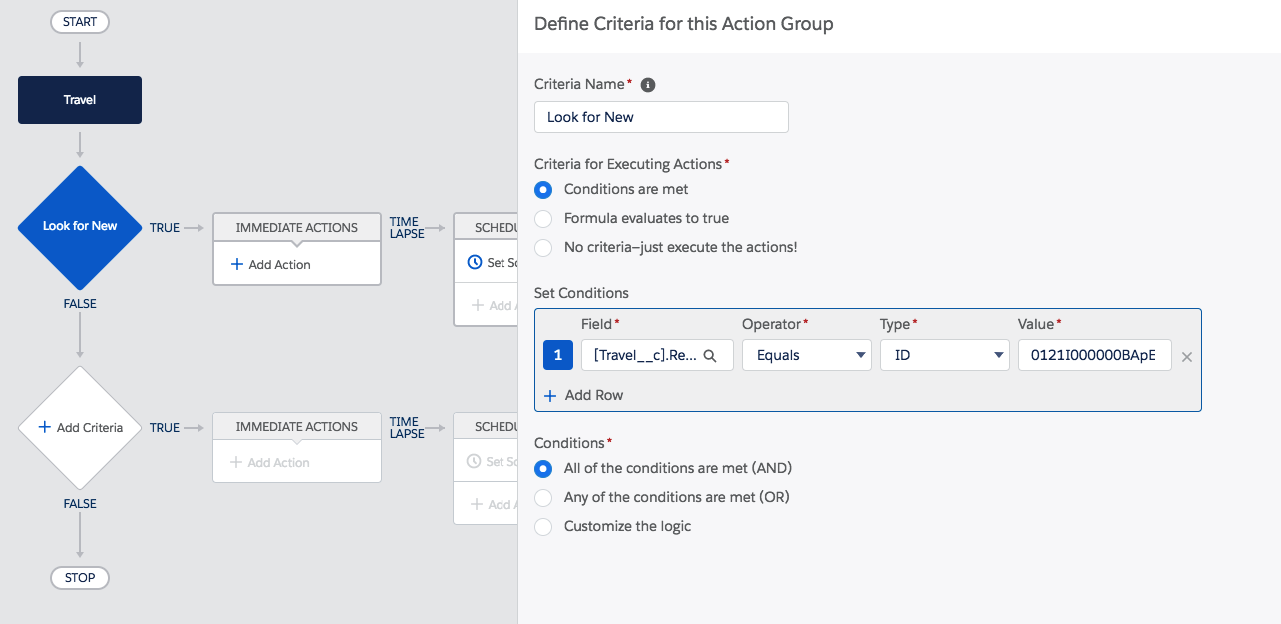
- On the ‘Immediate Actions’ select the Action Type as ‘Update Records’ and the Action Name as ‘Change Record Type’
- Under the ‘Record Type’ choose the record the started the process
- Again in the Field area select the record Type ID and change to the new ID

- Activate and we are set.
Now we start a new record

enter a travel name e.g. Summer Holiday. Click Save and then when the record detail is shown the main page layout is shown – because the record type has been changed to the Main record type with its page layout.

A fair amount of work but all declarative and fairly straightforward.

