Lightning Component with Leaflet.js

Leaflet.js is a excellent mapping component and is as a standalone resource has many features. It is well worth reviewing the documentation and examples from their website at leafletjs.com
This how to will develop a lightning component to display a point based on the geo location information on a contact record.
The first task is to get access to the code from within our page and the standard approach is to have this as a local static resource. See this page on the developer documentation.
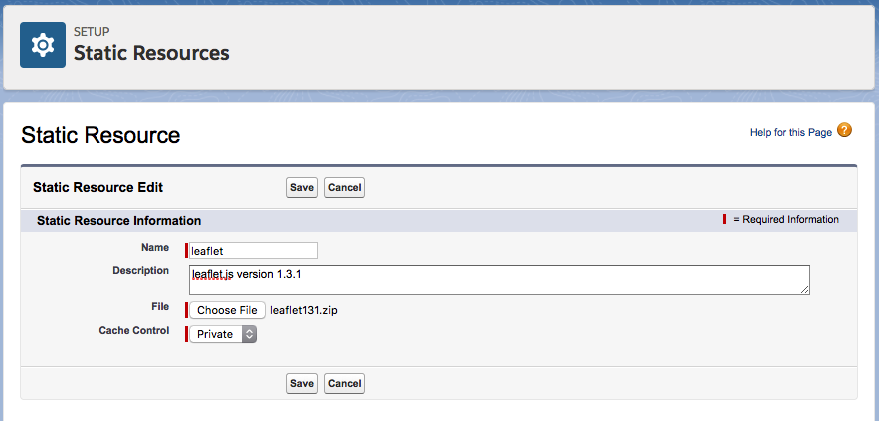
Download the latest version of the leaflet.js file (I am using 1.3.1 released Jan 2018). This is a zip file and should stay as such. From the setup menu enter ‘Static’ in the quick find to get to the Static Resources page.
Add a new static resource with the name leaflet and a description and location of the local zip file to upload.
Now we can start to build the lightning component. From the Developer Console create a new Lightning Component called ‘LeafletMap’. Start off with a simple set of boiler plate code – see this post of the force:recordData.
<aura:component implements="force:appHostable,flexipage:availableForRecordHome,force:hasRecordId">

<aura:attribute name="record" type="Object"/>
<aura:attribute name="simpleRecord" type="Object"/>
<aura:attribute name="recordError" type="String"/>

<force:recordData aura:id="recordLoader"
recordId="{!v.recordId}"
layoutType="FULL"
targetRecord="{!v.record}"
targetFields="{!v.simpleRecord}"
targetError="{!v.recordError}"
/>

</aura:component>
Return to an account and then Edit Page. Drag the new ‘LeafletMap’ to the right hand side bar. Then Save and Activate for the Org Default.
At the moment there is nothing to show on the component so nothing will appear.
Back in the code let’s get a basic map appearing.
Add the following code to the component
<aura:handler name="init" value="{!this}" action="{!c.doInit}"/>

<ltng:require styles="/resource/leaflet/leaflet.css" />
<ltng:require scripts="/resource/leaflet/leaflet.js" afterScriptsLoaded="{!c.jsLoaded}" />

<aura:attribute name="map" type="Object"/>
<aura:attribute name="markers" type="Object"/>
Firstly we need to handle the doInit, then we need the css and javascript files from the static resource that was uploaded and finally we have two attributes to hold the map and then the markers layer (see this tutorial).
Add in the following code to show any force:recordData errors:
<aura:if isTrue="{!not(empty(v.recordError))}">
<div class="recordError">
<ui:message title="Error" severity="error" closable="true">
{!v.recordError}
</ui:message>
</div>
</aura:if>
Now we can get to the display:
<lightning:card >
<aura:set attribute="title">
{!v.simpleRecord.Name}
</aura:set>
<div aura:id="mapid" style="height: 600px;"></div>
</lightning:card>
This is a simple card with a title and then a div which will hold the map. The height: 600 px can be changed to suit, but needs to be set to something.
To check that we have the basic map we need to initialised in the controller. We will hook into the jsLoaded function which will call after the javascript is loaded.
jsLoaded: function(component, event, helper) {

var mapDiv = component.find('mapid').getElement();
var mymap = L.map(mapDiv, {zoomControl: true,zoom:1,zoomAnimation:false,fadeAnimation:true,markerZoomAnimation:true}).setView([51.503324, -0.119543], 11);
component.set("v.map", mymap);

L.tileLayer('https://api.tiles.mapbox.com/v4/{id}/{z}/{x}/{y}.png?access_token=add.token.here', {
attribution: 'Map data © <a href="http://openstreetmap.org">OpenStreetMap</a> contributors, <a href="http://creativecommons.org/licenses/by-sa/2.0/">CC-BY-SA</a>, Imagery © <a href="http://mapbox.com">Mapbox</a>',
maxZoom: 18,
id: 'mapbox.streets',
accessToken: 'add.token.here'
}).addTo(mymap);

var markers = L.layerGroup().addTo(mymap);
component.set("v.markers", markers);
},

doInit: function(component,event,helper) {
},
This code uses the Leaflet.js library to initialise the map. Firstly the Div is located and then the map initialised.
We will need a Latitude and Longitude (use the ‘Get Latitude and Longitude’ website to find an example location). We then save this to the attribute for the next time the page is loaded.
A base layer is required and MapBox Streets layer is a good resource. In order to use Mapbox you will need an access token.
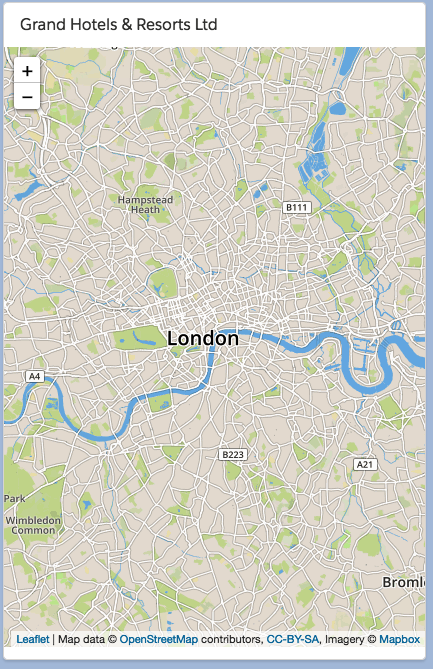
By this stage you should have a basic map showing on the page, with the title of the account :
We could add a dedicated Geolocation for the object but instead will use the inbuilt geolocation for the billing address – see the Summer ’16 release notes. This needs to be activated in setup. Under ‘Data Integration Rules’ active the ‘Geocodes for Account Billing Address’

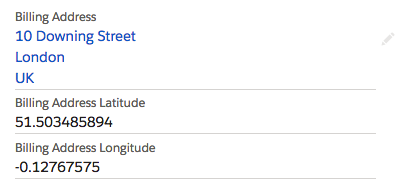
What this setting means is that when a Billing Address is updated then in the background a latitude and longitude are added to the BillingAddress. It is a good idea to show this on the page layout and a bit easier to access this in the code we are writing.
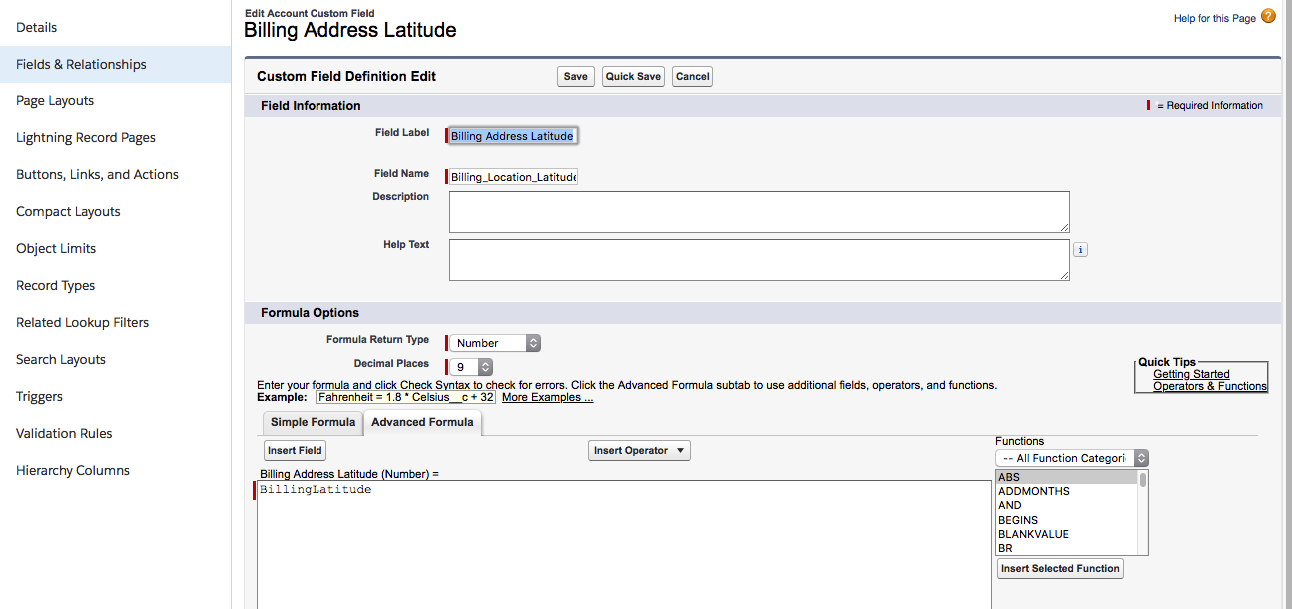
Create a formula field called Billing_Address_Latitude that is a number type, with 9 decimal places and where the formula is simply BillingLatitude (by choosing from the Insert Field button). Repeat for Billing_Address_Longitude choosing BillingLongitude.
When these are on the page layout (perhaps added under the Billing Address), the geolocation is displayed.
then add in the helper function:
addMarkers: function(component) {
var markers = component.get('v.markers');
var record = component.get('v.simpleRecord');
var map = component.get("v.map");

console.log(record.Billing_Address_Latitude__c);
console.log(record.Billing_Address_Longitude__c);

if (markers) {
markers.clearLayers();
}

if (record.Billing_Address_Latitude__c != null & record.Billing_Address_Longitude__c != null)
{
window.L.marker([record.Billing_Address_Latitude__c ,record.Billing_Address_Longitude__c ]).addTo(markers).bindPopup(record.Name);
map.panTo([record.Billing_Address_Latitude__c ,record.Billing_Address_Longitude__c ], 13);
}
},
If there is a valid goelocation then firstly this is added to our layer control (it is a layer with one item on it) and then we move the map to the location with the panTo call – all well documented on Leaflet
Initially we will use the doInit function to check if we have record to then call this helper:
doInit: function(component,event,helper) {
var record = component.get('v.simpleRecord');
if (record != null)
{
helper.addMarkers(component);
}
},
Then add at the end of the jsLoaded function
var record = component.get('v.simpleRecord');
if (record != null)
{
helper.addMarkers(component);
}
The reason behind this ‘doubling up’ is that we have a number of scripts being loaded and events firing. It is not guaranteed which will finish first the DoInit or jsLoaded and when the record will be loaded. So we hedge our bets.
We should now have a working map that shows the location in the control and centred.
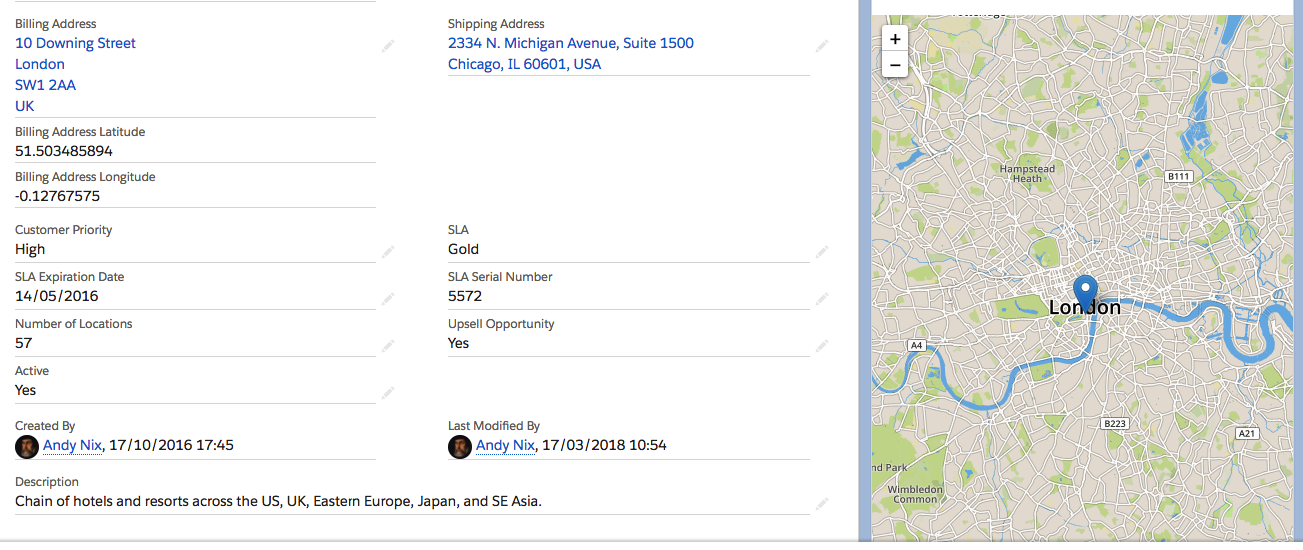
One slight issue is that if our billing address changes then we only move the map on refresh.
To rectify this we need to use the force:recordData event for the record changing. See this post for more details.
Modify the force:recordData to add the recordUpdated
  <force:recordData aura:id="recordLoader"
recordId="{!v.recordId}"
layoutType="FULL"
targetRecord="{!v.record}"
targetFields="{!v.simpleRecord}"
targetError="{!v.recordError}"
recordUpdated="{!c.recordUpdated}"
/>
Now add in the controller:
recordUpdated: function(component, event, helper) {

var changeType = event.getParams().changeType;

if (changeType === "ERROR") { /* handle error; do this first! */ }
else if (changeType === "LOADED") { /* handle record load */ }
else if (changeType === "REMOVED") { /* handle record removal */ }
else if (changeType === "CHANGED") {
helper.addMarkers(component);
}
},

